
Uncategorized
Pinchweld Rubber Seal Selection: Profiles, Flange Thickness and Installation for Canopies and Toolboxes
Oct
Most pinchweld rubber seal failures come down to one avoidable mistake: choosing a profile that does not match the flange. The seal may look right, fit loosely onto the panel edge, and even hold in place temporarily, but under road vibration, weather cycling, and UV exposure, the wrong profile will leak, rattle, or pull free. For canopy and toolbox builds, where watertight sealing and a rattle-free fit are non-negotiable, that mismatch is a costly problem to fix after the fact.
This tutorial works through the full selection and installation process for pinchweld rubber, starting with how these seals actually function mechanically, then moving through profile shapes, bubble orientation, and the single most important measurement you will take before ordering: flange thickness. You will also learn why surface preparation is the step most installation guides gloss over, and how to work through a complete installation correctly the first time.
Whether you are fitting a canopy lid, sealing a toolbox lid, or weatherproofing a custom panel edge, the guidance here will help you select the right EPDM profile, prepare the surface properly, and install a seal that holds.
What Is a Pinchweld Rubber Seal and How Does It Work
A pinchweld rubber seal grips a flange or panel edge through a U-shaped channel body that clamps onto the edge mechanically. A hollow bubble or lip on the exterior side of the channel compresses against the mating surface when a door or lid closes, forming the weather seal. The channel body is reinforced with an embedded steel carrier, which maintains consistent clamping force over time without the rubber permanently deforming or losing grip.
EPDM (Ethylene Propylene Diene Monomer) rubber dominates pinchweld seal applications due to its UV stability, ozone resistance and capacity to handle the thermal cycling common across Australian outdoor environments, from alpine cold to outback heat. PVC variants exist but EPDM is the preferred choice for outdoor, high-UV applications.
Most modern pinchweld seals are manufactured using co-extrusion, where the channel body and sealing bubble are produced from different rubber compounds in a single pass. This allows a harder, stiffer compound in the channel for grip and retention, alongside a softer, more compressible compound in the bubble for effective sealing under low closing force.
In practice, pinchweld rubber seals are the standard sealing solution for 4WD canopy doors, ute toolbox lids, camper trailer hatches and storage compartment lids. Any application requiring a compressible seal between a moving panel and a fixed frame edge is a candidate for a pinchweld profile.
Pinchweld Profile Shapes: What Each One Is For
Rubber seals are manufactured in five standardised profile shapes, and the shape determines the mounting method, not just the appearance. Selecting the wrong shape for the mounting geometry is a primary cause of seal failure before flange thickness is even considered.
D-profile seals have a flat adhesive-mount base with a hollow D-shaped bubble on top. They do not grip a flange; the base bonds to a flat face and the bubble compresses against a closing panel. Use them where no projecting flange edge exists.
U-profile seals are the correct choice for canopy doors and toolbox lids. The U-channel grips the flange edge directly, making the seal self-retaining under correct fit conditions without requiring adhesive as the primary retention method. This is why they are specifically called pinchweld seals.
P-profile seals combine a mounting stem with a round hollow bulb. The bulb compresses across a variable gap, making P-profiles useful where the closing gap is inconsistent, but they provide no flange-gripping function.
E-profile seals extend multiple sealing lips from a common base, creating redundant contact lines. They suit closed tool storage where dust exclusion must work in parallel with weather sealing, since a single lip breach does not compromise the full seal path.
T-profile seals insert into a machined slot or groove rather than fitting over an edge. They suit aluminium extrusions used in canopy framing and drawer system tracks, where a recessed channel is already present.
For most canopy and toolbox builds, U-profile pinchweld seals are the correct starting point. The other profiles only become relevant when the mounting surface specifically matches their geometry.
Top Bubble vs. Side Bubble: Choosing the Right Orientation
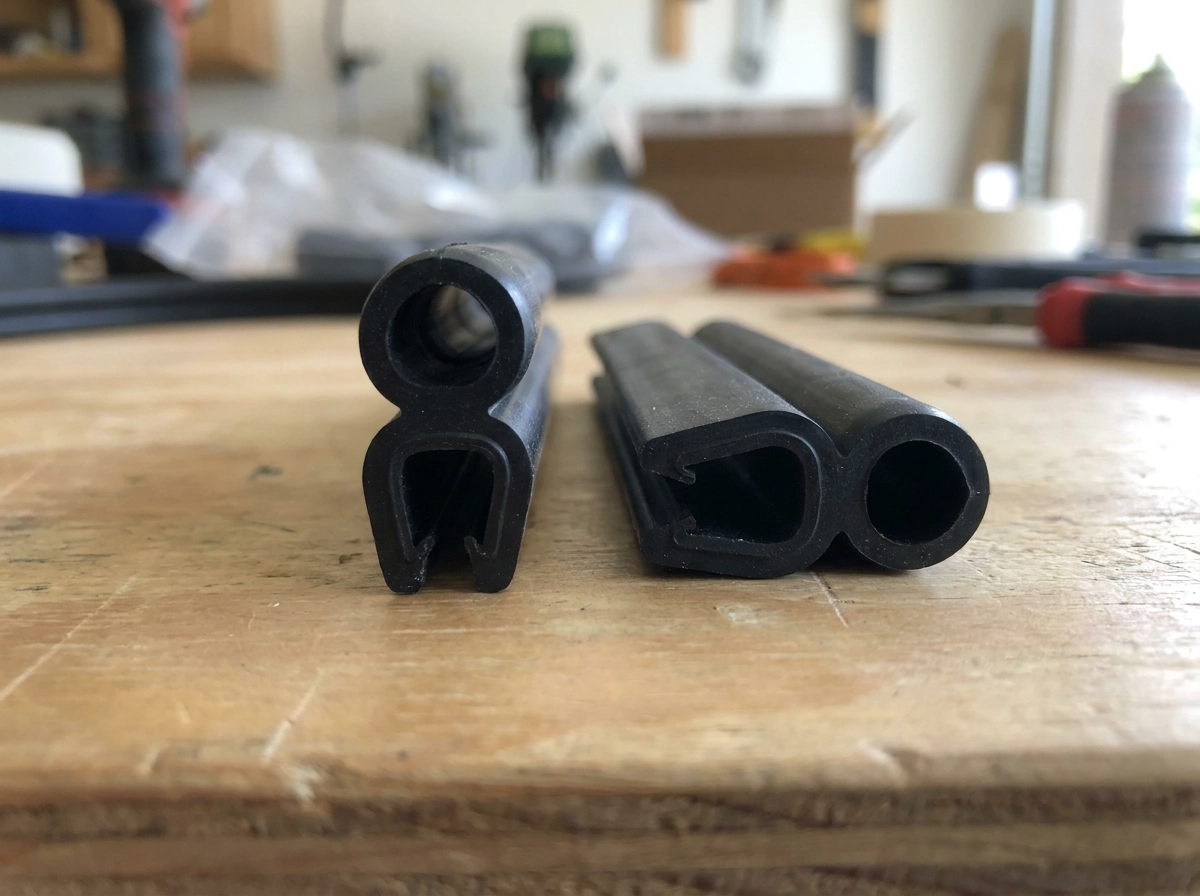
Once you’ve confirmed the correct U-profile for your application, the next decision is bubble orientation, and it’s one where a wrong choice is just as damaging as a mismatched flange.
Top bubble (top profile) seals position the hollow sealing bulb above the U-channel. The bubble compresses against the underside of a lid or panel that travels vertically downward onto the flange as it closes. This orientation is correct for horizontal applications: toolbox lids, canopy roof hatches, and top-hinged access panels. Trailer Parts Direct stocks the Pinchweld Small Top Seal for lids and hatches of this type.
Side bubble (side profile) seals position the bulb to the side of the channel. The bubble compresses laterally against a vertical face as a door swings shut. This is the correct orientation for vertical canopy doors, side-hinged panels, and tailgate frames. The pinchweld side bubble seal range covers those vertical applications.
Installing a top bubble seal on a vertical door frame is a common and costly mistake. The bubble faces upward, not outward, so it never makes consistent contact with the closing panel. The result is water ingress and dust penetration along the full door run, even though the seal appears correctly installed from the outside.
How to determine the correct orientation: identify the direction of panel travel as the door or lid closes. Panel moves downward onto the flange: use top bubble. Panel swings or slides laterally into the seal: use side bubble.
At canopy corners where both vertical and lateral contact occurs, use a mitre cut or pre-formed corner piece. Without one, the seal bunches at the corner and breaks contact on both faces.
Confirm bubble orientation before measuring flange thickness. Both decisions are required; neither substitutes for the other.
Flange Thickness Matching: The Most Important Measurement You Will Take
With bubble orientation confirmed, flange thickness becomes the next critical variable, and where most selection errors occur.
Every profile carries a published grip range showing minimum and maximum flange thickness; check that specification rather than the nominal channel opening.
When the flange is thinner than the channel minimum, the steel carrier cannot generate adequate clamping force. The seal will slide, rattle or detach under road vibration. This is common on thin aluminium canopy skins and light-gauge toolbox sheet metal, where folded edges produce flanges at the lower end of most grip ranges.
When the flange is thicker than the channel maximum, the channel walls are forced open beyond their design limit. The rubber fatigues prematurely, the sealing bubble is displaced, and the seal looks correct from outside while the weather seal is already compromised.
Measure at Multiple Points
Use a digital vernier caliper, as detailed in the installation steps below, and take readings at multiple points. Fabricated canopy panel edges are routinely inconsistent due to welding distortion, folded returns and variation in source plate thickness.
Folded aluminium canopy skins, folded steel toolbox plate, and welded flanges each sit in different thickness bands; measure your actual flange rather than assuming a typical value.
Where a weld bead increases local thickness mid-run, either grind the weld flush before fitting the seal, or select a profile whose grip range spans both the bare-metal and welded measurements.
Always match your measured thickness against the product’s published grip range, not the nominal channel opening. Co-extrusion tolerances mean the usable grip range under load is narrower than the unloaded channel dimension implies.
Why the Wrong Profile Fails: Leaks, Rattles and Detachment Explained
Getting the flange thickness right is necessary but not sufficient. Each failure mode below has a distinct cause, and misdiagnosing it leads to replacing the seal with the same problem.
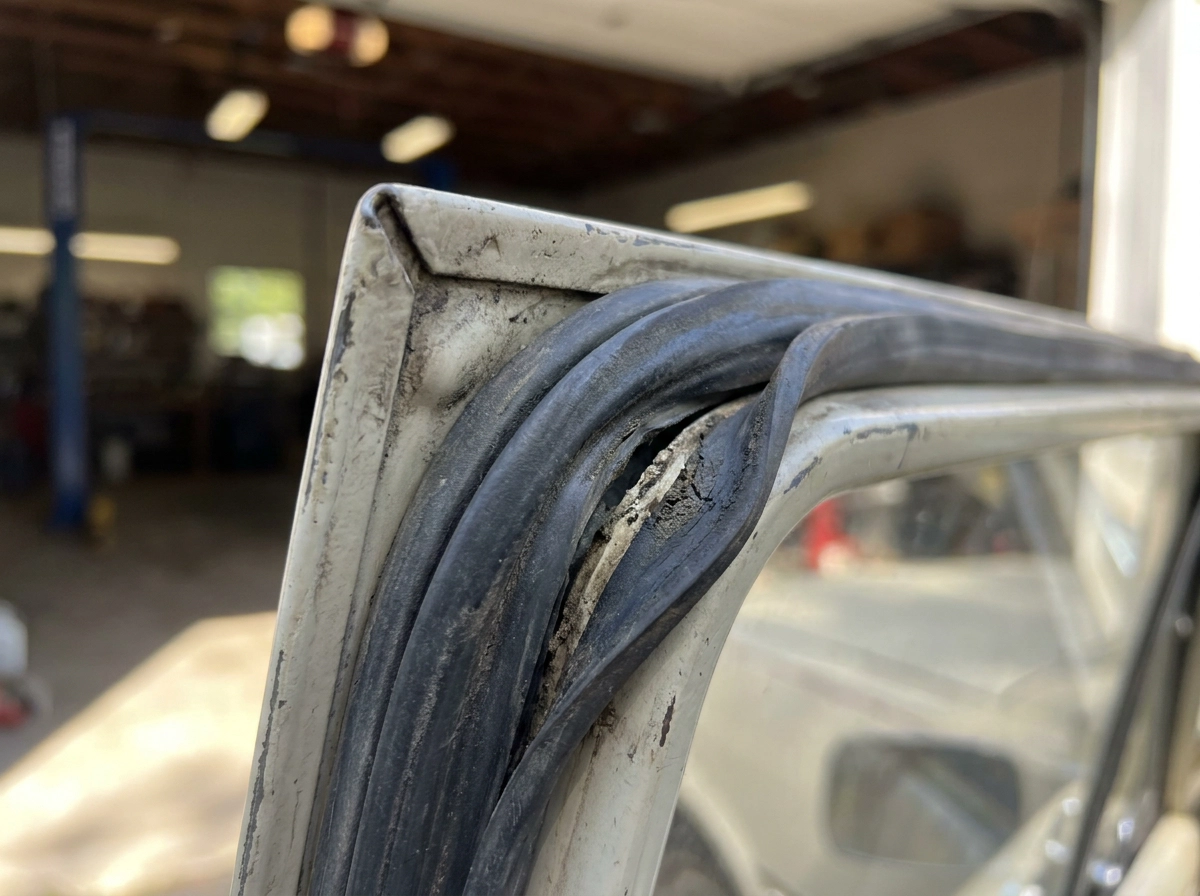
Corner leaks on canopy doors typically occur even when the channel fit is correct. A top bubble seal loses compression height as it bends through a tight-radius corner, and if the bubble height is marginal, contact with the mating panel breaks at that point. The straight runs seal; the corners don’t.
Rattling seals on toolbox lids almost always indicate an undersized channel relative to flange thickness. Without adequate clamping force from the steel carrier, the seal moves independently of the flange under road vibration. The seal is present and looks correct; it simply isn’t gripping.
Premature detachment on aluminium flanges has two distinct causes: undersized channel (as above), or inadequate surface preparation before adhesive application. On a smooth aluminium oxide surface, a seal relying solely on mechanical grip will detach once vibration overcomes the initial friction fit.
Water pooling despite an intact-looking seal points to incorrect bubble orientation. The bubble is compressing, but against the wrong face, leaving the actual weather path open.
Split or cracked bubbles appearing early in service generally indicate an oversized channel. Overstretching the channel walls during installation fatigues the rubber at the stress point, accelerating UV degradation precisely where the material is already compromised.
In every case, replacing a failed seal without correcting the root cause reproduces the failure on the same timeline.
Surface Preparation and Adhesion: What Most Installation Guides Skip
Premature detachment is usually a surface preparation failure, not a profile selection failure. Before pressing any pinchweld seal onto a flange, wipe the entire surface with isopropyl alcohol (IPA) on a lint-free cloth. Grease, powder coat release agents, fabrication lubricants and aluminium oxide all break the adhesive bond at the interface, and none are visible once the flange looks clean.
Raw aluminium flanges need one additional step before IPA cleaning: scuff the surface with fine abrasive paper. Aluminium forms a natural oxide layer that is smooth and non-porous. Scuffing cuts through it and creates mechanical key for the adhesive. Skip this step and the adhesive bonds to the oxide, not the parent metal.
Powder-coated steel flanges carry a different risk. At a tight-radius fold, powder coat is often thin, chipped or porous. A seal pressed over compromised coating appears to adhere, but the coating itself is separating from the substrate. Inspect the fold edge before applying any adhesive; strip back any loose or flaking powder coat before proceeding.
For vehicle-mounted toolboxes and canopies, or where the flange sits near the seal’s minimum grip range, apply contact adhesive or a rubber bonding primer to both the flange surface and the inside of the seal channel. Allow the adhesive to reach working tack before pressing the seal down; a bond made before tack develops feels solid initially but releases under vibration load.
At corners, do not stretch the seal into position. Tension-stretched rubber returns to its resting length and pulls the seal off the flange at the corner over time. Cut the seal at each corner and butt-join with adhesive instead, or use a pre-formed corner piece where available.
Step-by-Step Installation for Canopy and Toolbox Pinchweld Seals
With surface preparation complete, follow this sequence exactly.
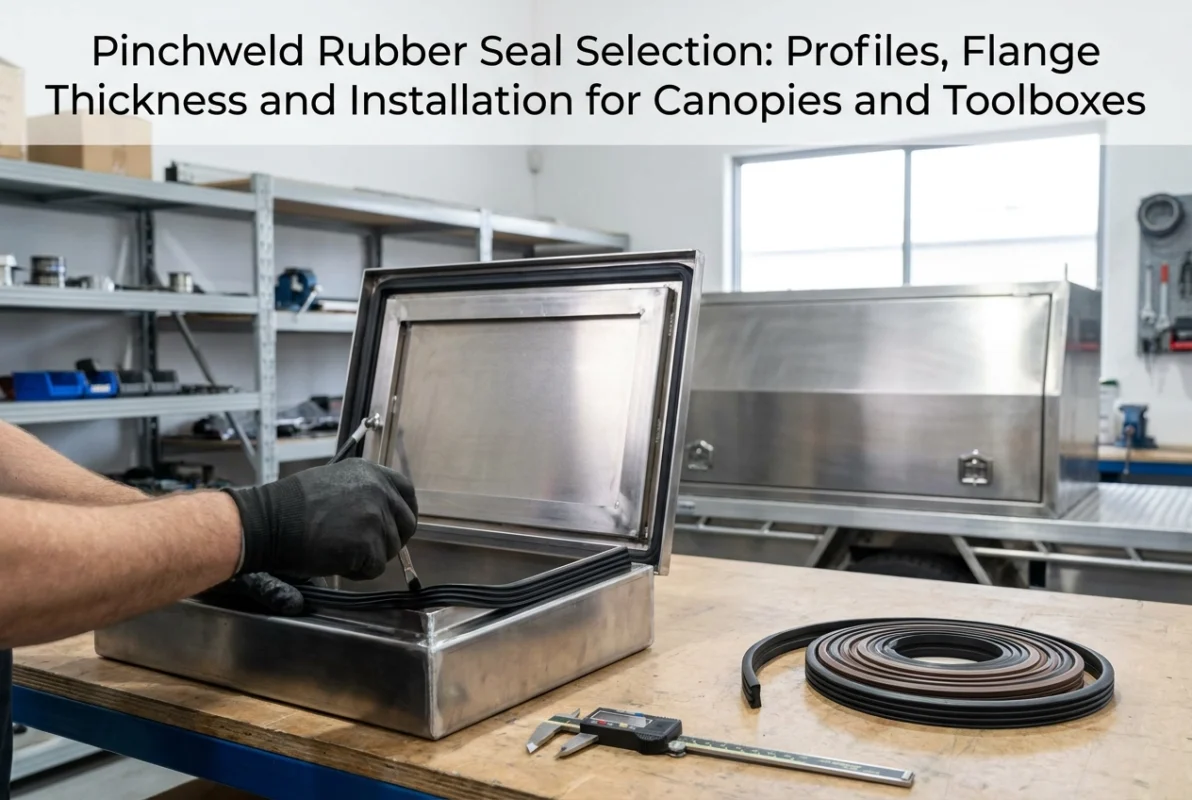
Step 1: Measure and confirm. Using a digital vernier caliper, measure flange thickness at a minimum of five points along the full seal run. Confirm every measurement falls within the selected seal’s published grip range before cutting anything.
Step 2: Cut to length. Cut the seal slightly longer than the measured run using a sharp utility knife or tin snips. Cut perpendicular to the seal axis. Angled cuts on straight runs create a gap in channel grip; only cut at an angle when mitre-fitting a corner joint.
Step 3: Prepare the surface. Wipe the flange with isopropyl alcohol and allow it to dry fully. If using adhesive, apply to both surfaces and wait for working tack, full guidance is in the Surface Preparation section above.
Step 4: Start at a reference point. Begin at a corner or fixed datum, never mid-run. Press the channel squarely onto the flange with firm thumb pressure and work progressively along the run. Pull-free installation, as described in the surface preparation section, prevents corner detachment.
Step 5: Work corners without stretching. Press the seal into each corner radius without loading tension into the preceding straight run. For tight corner radii, make shallow relief cuts on the outer face of the channel so the seal follows the curve without buckling or gapping.
Step 6: Join the ends. On a closed-loop run, cut the final end square so it butts flush against the start. Apply rubber contact adhesive to both faces and hold under compression for the adhesive’s specified cure time.
Step 7: Test before closing. Run a finger along the full length confirming the channel is fully seated and the bubble faces the correct mating surface. Close the lid slowly and verify the bubble compresses evenly before applying any latch load.
Selecting the Right Pinchweld Rubber Seal for Your Build
Trailer Parts Direct stocks EPDM pinchweld seals suited to outdoor Australian conditions in both top bubble and side bubble profiles, covering the flange thickness ranges most commonly encountered in Australian 4WD canopy, ute toolbox and camper trailer fabrication.
When selecting from the range, lead with your confirmed flange thickness measurement and bubble orientation requirement. Seal height and colour are secondary; channel-to-flange fit is the specification that determines whether the seal performs or fails.
For welded canopy builds where flange thickness varies along the run, contact Trailer Parts Direct directly to confirm which profile’s grip range accommodates the variation without a mid-run seal change. A single profile with a wider grip range is always preferable to joining two different seals at a thickness transition.
EPDM’s resistance to ozone and UV degradation makes it the correct material choice for Australian conditions, covering alpine temperature cycling, outback heat and the ozone exposure common in industrial workshop environments where toolboxes are stored long-term.
For canopy lids combining a pinchweld seal with compression latches, hinges or gas struts, verify seal height against the latch engagement geometry before finalising your selection. If the compressed seal height exceeds the latch’s pull-down travel, the lid will not close fully and the latch will not engage.
Getting Pinchweld Selection Right: Key Takeaways
With the right product selected, these are the principles that determine whether it performs.
Profile shape and bubble orientation come first. Before measuring anything, confirm that the seal geometry matches the mounting surface and the direction the closing panel travels. A correctly sized channel on the wrong profile fails as reliably as a mismatched flange.
Flange thickness must fall within the published grip range. Channel-to-flange fit, not nominal channel opening, determines grip.
Surface preparation is not optional in high-vibration applications. Mechanical and adhesive detachment are separate problems; the surface preparation section addresses each.
Every common failure points to a diagnosable mismatch. Each failure mode has a specific cause identified earlier in this guide.
The four-step sequence eliminates most failures: measure the flange, confirm the grip range against published specifications, prepare the surface, then install progressively without stretching tension into the run. Applied in order, these steps address every primary failure mode covered in this guide.