
Uncategorized
Water Storage Tanks for Vehicles and Trailers: Capacity, Mounting and Material Guide
Oct
Most camper van and trailer builds stall at the water system. Not because the plumbing is complicated, but because choosing the right water tank involves a tangle of interdependent decisions that most guides gloss over entirely. Get the capacity wrong and you run dry on day three, or you carry 40 kilograms of deadweight that eats into your payload allowance. Choose the wrong mounting position and you compromise either your interior layout or your cold-weather usability. Specify the wrong material and your drinking water is stored in a vessel that was never designed for potable use.
This guide works through the full decision chain for UK vehicle and trailer builders: from calculating realistic daily water consumption and sizing your tank accordingly, through material specifications and what food-grade polyethylene actually requires, to mounting geometry, chassis attachment hardware, and pump selection. Whether you are fitting a compact internal tank under a bench seat or engineering an underslung system for a full-time touring build, the sections below give you the technical framework to make each call with confidence rather than guesswork.
Why Tank Selection Shapes the Entire Build
Water storage decisions cascade through every subsequent stage of a vehicle or trailer build. Get the capacity, position, or material wrong early, and correcting it later means dismantling cabinetry, re-routing plumbing, or remanufacturing chassis brackets. The cost is not just financial; it is lost build time at a point when the project is already committed.
Water weight is the single most underestimated variable in self-builder builds. Water weighs 1 kg per litre, without exception. A 100-litre fresh water tank adds 100 kg to your payload before the tank’s own weight is counted. In a van or trailer with a modest remaining payload margin, that figure alone can push the build over its legal laden weight limit. Oversizing is routine among first-time builders, who specify capacity for a theoretical worst case rather than realistic use, and it is one of the most expensive mistakes to undo once the build is complete.
Tank geometry is equally consequential. The physical dimensions of the tank, combined with the positions of its inlets, outlets and vents, determine where pipework must run, where the pump can be located, and how cabinetry and floor framing must be arranged around it. These relationships cannot be resolved retrospectively. A tank selected after cabinetry is built often cannot be installed in the optimal position, if it fits at all. The mounting method, whether internal brackets or underslung chassis cradle, must be known before floor framing or structural brackets are committed.
Material specification is a separate decision that applies differently to fresh and grey water. Food-grade polyethylene is mandatory for any tank carrying potable water. Grey water tanks, handling waste from sinks and showers, do not carry this requirement; standard rigid plastic is adequate and considerably less expensive. Conflating the two specifications leads either to unnecessary spend on grey water containment or, more seriously, to potable water stored in a tank not certified for the purpose.
For builders in the early stages, a phased approach is worth serious consideration. Starting with portable containers for one season allows actual daily consumption to be measured across real trip conditions, before a fixed water storage tank installation is specified. Experienced builders increasingly adopt this sequence precisely because it eliminates the guesswork that drives oversizing and poor mounting decisions.
How to Calculate the Right Tank Capacity for Your Build
Once you know that water weighs exactly 1 kg per litre, capacity planning becomes a straightforward engineering calculation rather than guesswork.
Establish Your Daily Usage Baseline
Start with the two-person daily figures that apply to your build type. Two people without an onboard shower need approximately 10-15 litres per day covering drinking, cooking and basic handwashing. Add a shower to that setup and daily consumption rises to 25-40 litres, because even a brief 3-minute camp shower uses 6-10 litres at typical 12V pump flow rates.
Match Capacity to Build Type
Research data points to three practical capacity bands:
- Weekend vans: 25-45 litres, covering two people over a long weekend between refills
- Touring couples: 45-70 litres, suited to 3-4 day trips with moderate washing but no onboard shower
- Full-timers and shower-equipped conversions: 100+ litres, essentially mandatory once daily usage consistently exceeds 30 litres
These are starting references, not fixed rules. Your actual number comes from the calculation below.
The Capacity Calculation
Multiply your daily usage estimate by the number of days between planned refills, then add 15-20% as a buffer for guests, spillage and uncertain resupply. For example: two people with showers, planning 3-day intervals between fills.
35 litres x 3 days = 105 litres, plus 20% buffer = 126 litres minimum tank size.
That figure is a floor, not a target. Specifying a larger tank than your minimum does not improve the build unless the payload budget allows it.
Weight Budget Verification
Convert your minimum capacity directly to kilograms, then check it against your vehicle’s remaining payload margin. A 126-litre minimum means 126 kg of water, before the tank’s own weight. If that figure exceeds what your vehicle can carry after accounting for passengers, furniture and equipment, reduce planned trip duration between refills rather than accepting an overloaded vehicle. A 3-day interval becomes 2 days; minimum capacity drops accordingly.
Off-Road and Remote Builds
Remote touring changes the calculation significantly. If resupply intervals extend to 3-5 days, as is common on serious off-road routes, minimum capacity for a showering couple easily reaches 150-200 litres. Large water tank configurations are standard practice for this reason, not an upgrade. Build the capacity requirement from the resupply interval first, then verify weight and mounting space.
Trailer-Specific Weight Considerations
Trailer builds carry tank weight on the trailer axle rather than the tow vehicle’s payload, which appears to remove the problem. It does not. Full tank weight directly influences tow ball download, which affects steering response and traction on the tow vehicle. It also counts toward the trailer’s gross laden weight, which must remain within the trailer’s legal maximum for your licence category and tow vehicle rating. Calculate trailer tank weight against both the trailer’s plated maximum and the tow vehicle’s stated tow ball load limit before finalising capacity.
Tank Material Selection: Food-Grade Polyethylene and What It Actually Means
Once you have a capacity figure, the next decision is material, and it is not negotiable for fresh water.
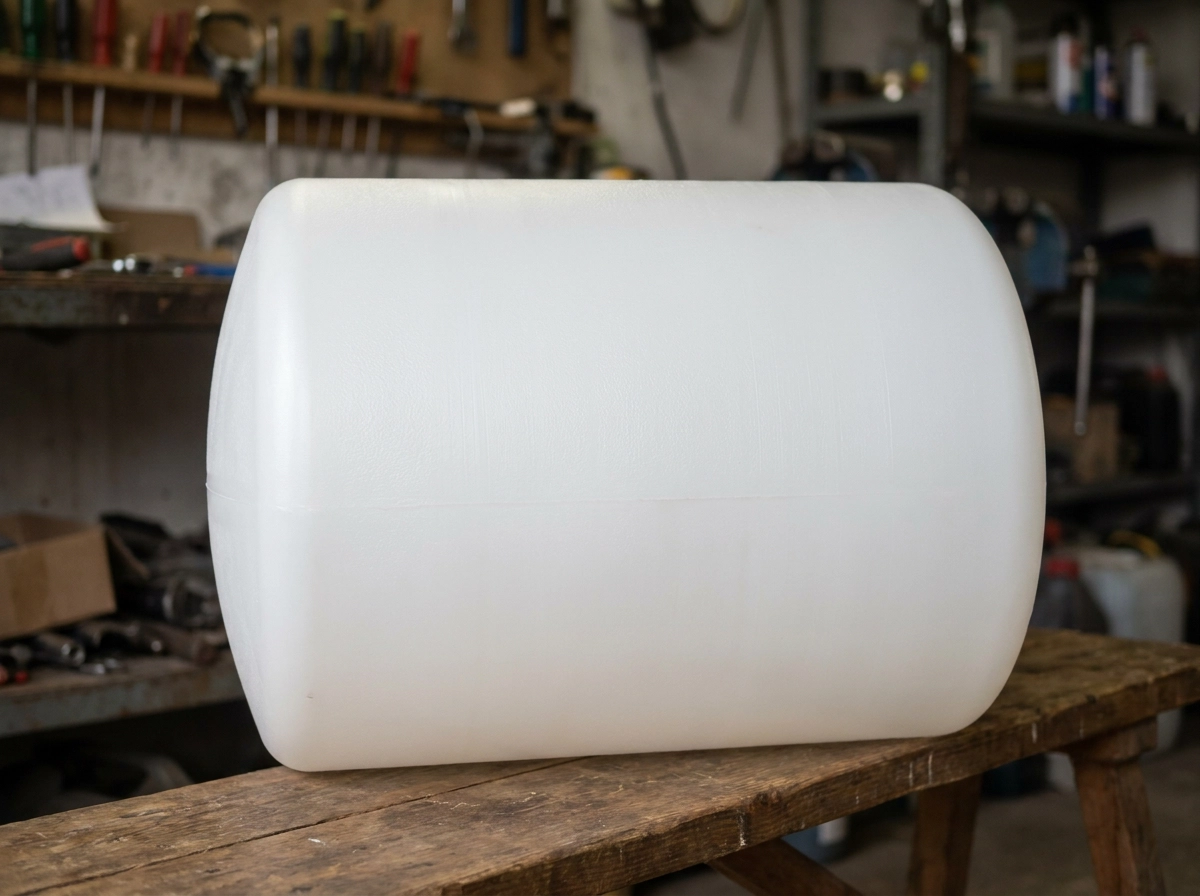
Food-grade polyethylene (PE) is the correct material for any potable water tank in a vehicle build. It is chemically inert, imparts no taste or odour to stored water, and is produced in rotationally moulded forms that accommodate the irregular geometries typical of van floors, trailer chassis and cab-over compartments.
The food-grade designation is not a marketing label. It refers to the specific resin grade and the additives used during manufacture. Food-grade PE excludes recycled content, and excludes pigments or stabilisers that could leach into potable water over time. A tank described only as “plastic” or “polyethylene” without explicit food-grade certification does not meet this requirement, regardless of how it looks or how it is marketed. When purchasing, look for confirmation that the tank complies with a recognised food-contact standard such as NSF/ANSI 61 or the equivalent BS EN or Water Fittings Approval scheme criteria applicable in the UK.
Grey water is a different matter entirely. Waste water from sinks and showers carries no potability requirement, so non-certified PE or standard rigid plastic tanks are entirely appropriate. Applying food-grade specification to a grey water tank achieves nothing and adds unnecessary cost. Keep the requirements separate and specify accordingly.
Why Rotational Moulding Matters
Rotationally moulded PE tanks are formed as a single seamless piece with no welded joints or bonded seams. In underslung and off-road applications, where the tank is subject to continuous vibration, chassis flex and occasional impact loads, a seamless construction eliminates the primary leak risk present in fabricated or multi-piece tanks. For any installation that will see rough terrain, rotational moulding is the construction method to specify.
Alternatives and Their Limitations
GRP (fibreglass) and stainless steel tanks appear in larger motorhome and marine applications. For self-builder vehicle conversions, both present practical problems. GRP is difficult and expensive to form into custom shapes that suit specific mounting envelopes. Stainless steel is heavy and costly, and custom fabrication to fit an irregular chassis space is a specialist task beyond most self-build budgets. Food-grade PE remains the practical choice across the full range of van, trailer and off-road builds.
UV Exposure and External Mounting
Food-grade PE formulations typically incorporate UV stabilisers, which provide meaningful resistance to photodegradation. However, no plastic tank is immune to prolonged unprotected outdoor exposure. Any tank mounted externally or in an unshielded position will degrade over time, eventually becoming brittle and prone to cracking. For external installations, plan physical shielding as part of the mount design, or apply a UV-resistant coating to the tank exterior as a supplementary measure.
Internal vs Underslung Mounting: Trade-offs Every Builder Must Understand
Once material specification is resolved, mounting position becomes the next decision, and it has consequences that run through your entire build layout.
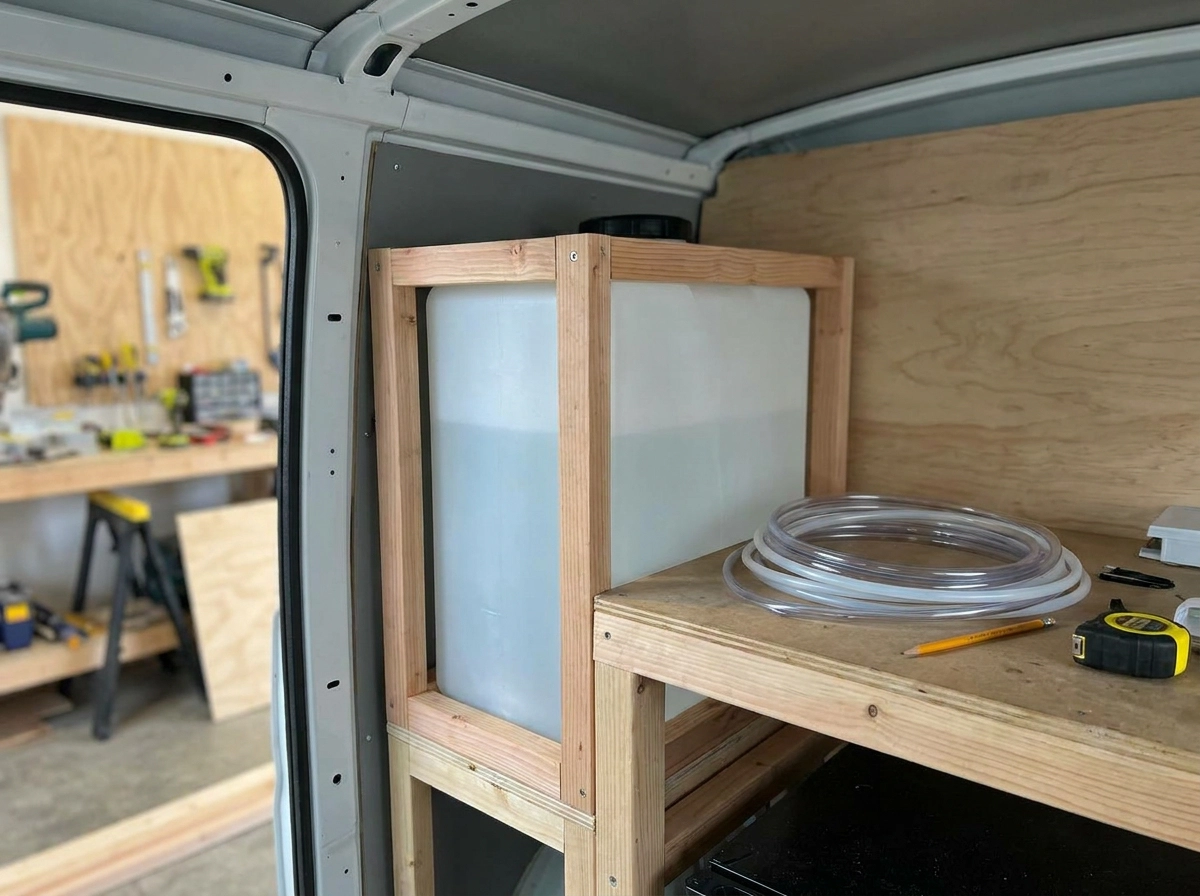
Internal mounting (under a seat, within a bed frame, or built into cabinetry) keeps the tank within the heated cabin envelope. This matters in the UK: an internally mounted tank benefits from ambient warmth and remains viable year-round without any additional freeze protection. Inspection and servicing are straightforward, and access for cleaning or connection checks can be designed in from the start. Internal mounting suits capacities in the 25-60 litre range, covering most weekend builds and short-touring configurations.
The cost is interior volume. A 50-litre tank is roughly the size of a large suitcase; in any build under 5 metres, that displacement is significant. Space surrendered to the tank cannot serve as storage, and in compact van or camper trailer conversions the trade-off compounds quickly once cabinetry, sleeping platforms and utility areas are also accounted for.
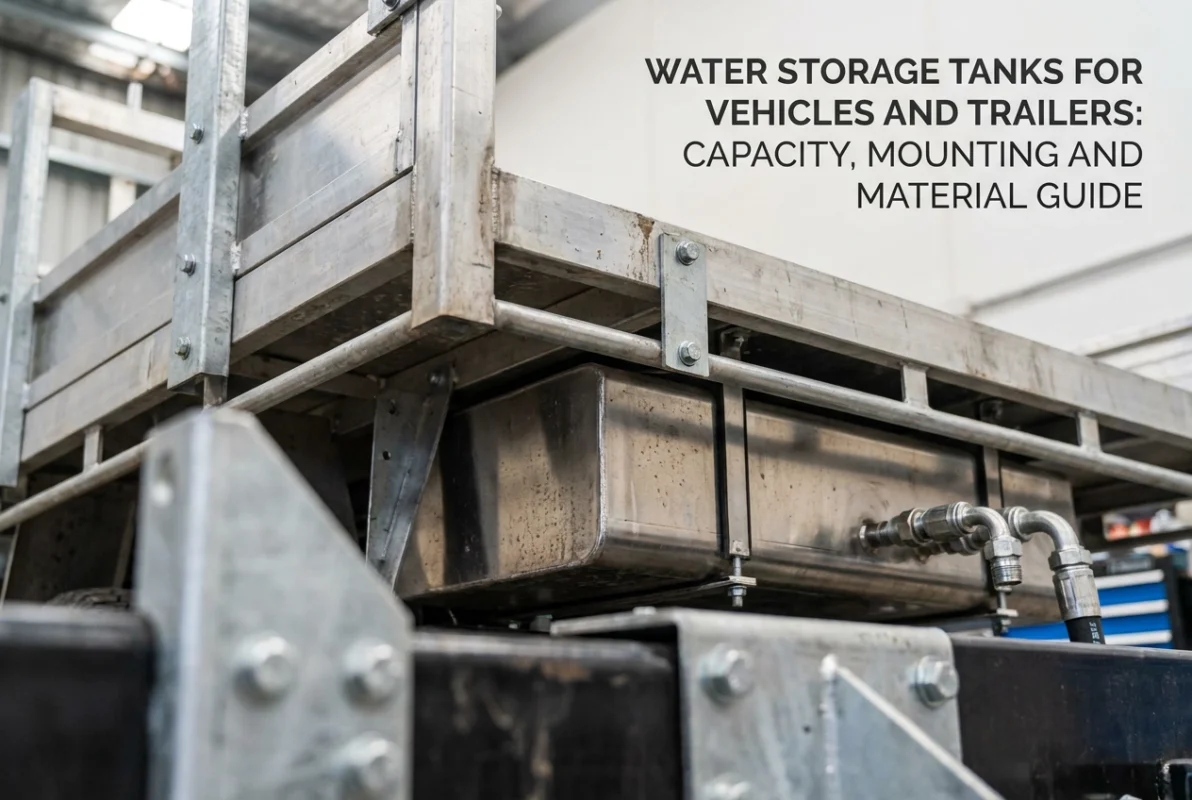
Underslung mounting (beneath the vehicle floor or trailer chassis) eliminates that interior penalty entirely. Larger capacities become practical, and the living space remains uncompromised. The engineering demands, however, are more serious: the installation must provide adequate chassis clearance, a rigid mounting structure capable of handling dynamic loads, and a freeze protection strategy for winter use. Insulation wrapping, self-regulating heat tape applied to the tank walls and exposed pipework, or a dedicated heating element are all established approaches; none can be omitted for a build intended to operate in sub-zero conditions.
Off-road builds add a further constraint. An underslung tank sits directly in the line of fire from rocks, ruts and debris. Ground clearance must be assessed against the vehicle’s specific approach and departure angles, and skid plate protection is strongly advisable on any build that will see serious off-road use. An unprotected 80-litre tank in the underfloor position is a significant vulnerability on rough terrain.
Winter use is frequently the deciding factor for UK builders currently. Internal mounting requires nothing beyond the tank itself. Underslung mounting in cold conditions requires a deliberate, layered approach to freeze protection, and that investment is worthwhile only where the capacity gain justifies it.
For shower-equipped conversions and extended touring builds, it usually does. Achieving 70-100+ litres internally is impractical in most van and trailer builds; the space penalty makes underslung mounting the only workable option at that capacity. The engineering requirements come with the territory, and the following section addresses the mounting hardware specifics in detail.
Mounting Hardware and Chassis Attachment: The Specifics Most Guides Skip
Choosing the right mounting position is only half the decision. How you attach the tank determines whether it stays there under load.
Underslung cradle design
Strap-only mounting is inadequate for any underslung tank that will see off-road use. Dynamic loads during impacts and rough terrain traversal can multiply the static weight of a full tank several times over in a single event. A 60-litre tank weighs 60 kg static; the effective load on its fixings during a hard impact is considerably higher. The correct approach is a rigid steel cradle fabricated from RHS (rectangular hollow section) or flat bar, welded or bolted directly to chassis mounting points. The cradle carries the full loaded tank weight and should be designed to a safety factor of at least 3x the static load. This is not conservative over-engineering; it reflects the actual loading environment.
Strap systems: secondary retention, not primary structure
Stainless steel banding and heavy-duty polyester straps with ratchet tensioners have a legitimate role, but only as a secondary retention layer in combination with a cradle, or for lighter tanks in on-road-only applications. For a large water tank in off-road service, straps alone are not an acceptable sole load path. They can loosen with vibration, degrade with UV and mud exposure, and provide no resistance to fore-and-aft movement under braking.
Fastener specification
At underslung mounting points, fasteners are continuously exposed to water, mud and road spray in locations that are genuinely difficult to inspect. Zinc-plated or mild steel hardware will corrode in this environment, often invisibly, until a fitting fails. Specify Grade 316 stainless steel fasteners throughout any exposed underslung installation. The cost difference over the life of the build is negligible; the consequences of a corroded mounting bolt are not.
Internal tank restraint
Internal tanks present a different problem. A tank that fits snugly when full will shift as it empties, because the remaining water redistributes and the tank walls deflect. Foam padding reduces vibration noise but provides no mechanical restraint against lateral or longitudinal movement under braking and cornering loads. Positive restraint in all three axes, using brackets, flanged mountings or a framed enclosure, is required.
Designing in service access
A tank you cannot reach will not be maintained. Before finalising any mounting arrangement, confirm that all fittings are reachable for tightening or replacement, that the tank can be physically removed for cleaning, and that there is a clear path to check connections. Removable cabinetry panels secured with quality latches and hinges make this practical. Panels fastened with dozens of screws behind fixed furniture guarantee the tank will be neglected.
Plumbing Integration, Pump Selection and System Layout
With the tank secured and service access confirmed, the next decisions are pump type, filtration and the two system details that most builds get wrong: ventilation and level monitoring.
Manual vs electric pump
Manual pumps, whether foot or hand operated, have no electrical draw, no pressure switch to fail, and a single moving part subject to mechanical wear. For a weekend build with one cold tap and no shower, they are entirely adequate and add no load to a 12V system. The moment a build includes a hot water system, shower or more than one outlet, a 12V electric diaphragm pump with a built-in pressure switch becomes the practical standard. The pressure switch activates the pump automatically when a tap opens and cuts it when pressure is restored, delivering consistent flow without manual priming or intervention.
Pump sizing
Match the pump’s rated output to peak simultaneous demand. A single cold tap draws 4-6 litres per minute; a shower running at the same time as a kitchen tap requires 8-12 litres per minute. Undersizing the pump produces a pressure drop under combined load, making both outlets frustratingly weak. Most 12V diaphragm pumps in the 30-60 watt range cover single-outlet builds; multi-outlet and shower builds warrant a pump rated at the top of that range or above it.
Inline filtration
Install a sediment pre-filter between the tank outlet and the pump inlet to protect the pump mechanism from particulates. A carbon filter placed after the pump improves taste and removes residual chlorine from treated mains water. Both filters must be sized to match the system’s flow rate; an undersized filter creates a pressure restriction that defeats pump output. Critically, both must be replaced on schedule. An overdue filter accumulates the contaminants it was installed to remove and becomes a source of bacterial growth rather than a barrier against it.
Tank ventilation
A sealed tank without a vent will either partially collapse inward as water drains, or develop an air lock that stops flow entirely. Neither failure is dramatic, but both stop the system working. The fix is straightforward: a vented cap on the fill inlet, or a dedicated vent line routed to a protected opening away from mud and water ingress. For underslung tanks, route the vent line up into the vehicle floor to keep the vent point clear of terrain debris.
Level monitoring
Running dry mid-trip with no warning is the most common operational failure in self-built systems. A float switch wired to a simple panel gauge provides electronic level indication and suits fixed, road-use builds. A sight tube, a clear hose connected between a low and high port on the tank exterior, displays level mechanically with no electronics to fail and no vibration sensitivity. For off-road builds subject to sustained vibration, the sight tube is the more reliable option.
Winter Use and Off-Road Builds: Additional Requirements for Demanding Conditions
A well-designed plumbing system performs reliably on sealed roads; demanding conditions require additional engineering at every layer.
Freeze protection for underslung tanks uses three measures in combination. Closed-cell foam insulation wrapping the tank body slows heat loss. Self-regulating heat tape applied to exposed pipework and tank walls actively prevents ice formation by increasing power output as temperature drops. A drain-down valve completes the system, allowing full evacuation when the vehicle will sit unused in sub-zero temperatures for more than a few hours.
Pipe runs between an underslung tank and interior outlets are the most vulnerable point in any winter build. Any section of pipework that leaves the insulated floor cavity and passes through an unheated void must be individually insulated or heat-traced. This is not a partial measure: a single frozen section anywhere in the run disables the entire system, regardless of how well the tank itself is protected.
Centre of gravity is a separate concern for off-road builds carrying large water tanks. A 100-litre tank holds 100 kg of water; mounted high inside the vehicle, that mass raises the centre of gravity in a way that meaningfully affects handling and roll stability on uneven terrain. Low and central positions reduce this risk. Underslung mounting at chassis height is actually beneficial for vehicle dynamics at large capacities, and resolves the interior space conflict at the same time.
Fitting selection requires an upgrade for off-road use. Push-fit connectors are adequate for road-use conversions but will loosen progressively under the vibration and chassis flex typical of corrugated tracks and rough terrain. Compression fittings or barbed fittings secured with screw clamps are the correct choice for any build that regularly leaves sealed roads. Inspect all connections after the first few off-road trips and re-torque as needed.
Water quality demands more active management when draws come from streams, bores or standing sources in remote locations. Fitting a pre-filter at the tank inlet, not only before the pump, prevents silt from accumulating inside the tank where it is difficult to remove. Silver-ion treated tanks suppress bacterial growth during extended trips; where tanks lack this treatment, periodic sanitisation with a food-safe solution maintains potability between resupply points.
Starting with Portable Containers: The Phased Approach to Water System Planning
All the technical detail covered so far assumes you know your requirements before you commit. For builders still in early stages, that assumption is often wrong, and the consequences of guessing badly are bolted into the floor.
Experienced UK builders increasingly recommend running portable containers, collapsible or rigid jerry-can style in the 10-25 litre range, through a full first season before specifying any fixed installation. The logic is straightforward: actual consumption patterns routinely differ from estimates, and the cost of correcting an undersized or oversized fixed tank after cabinetry is built around it is significant.
Portable containers generate real data. A builder who tracks usage across a weekend trip and finds they use 8 litres per day for two people can specify a fixed tank with confidence rather than defaulting to an oversized unit that consumes payload needlessly. Water weighs 1 kg per litre; a 40-litre surplus over actual need is 40 kg of permanent payload penalty.
The phased approach also protects the build sequence. Tanks are difficult to relocate once cabinetry, floor framing and plumbing runs are committed around them. Starting portable defers that decision until the interior layout is genuinely finalised, eliminating the common scenario where a fixed tank ends up in a structurally convenient but operationally poor position because an early decision forced it there.
Portable containers have firm limits. They cannot feed a 12V pressure pump system, which makes them incompatible with showers, hot water systems or any build requiring pressure at the tap. Manual decanting becomes operationally inconvenient once daily consumption exceeds 20-25 litres. For extended touring or any shower-equipped build, portable containers are a planning tool, not a long-term solution.
When upgrading to a fixed system, capture three specific metrics from the portable phase:
- Daily consumption by trip type (weekend, week-long, mixed)
- Peak demand periods, typically morning and evening when usage clusters
- Frequency of realistic resupply opportunities on your usual routes
These three data points define the minimum viable fixed tank size more precisely than any general-purpose guide. Rule-of-thumb figures are starting points; measured data from your actual build and travel patterns is the only reliable basis for a final specification.
Choosing the Right Water Tank: Actionable Takeaways
Whether you commit to a fixed system now or plan to upgrade from portable containers later, the same five decisions determine whether your water system works reliably for the life of the build.
Calculate capacity from daily usage multiplied by trip duration, then treat the result as a floor. Two people without showers use 10 to 15 litres per day; add showers and that rises to 25 to 40 litres. Multiply by days between refills, add a 15 to 20 per cent buffer, then convert litres directly to kilograms to check it against your remaining payload margin. Water weighs 1 kg per litre; a 100-litre tank adds 100 kg before the tank itself is weighed. If the figure exceeds your payload budget, shorten your resupply interval rather than overloading the vehicle.
Specify food-grade polyethylene for every fresh water tank, without exception. Food-grade PE uses virgin resin with no recycled content or leachable additives. A tank labelled simply “polyethylene” or “plastic” without food-grade certification does not meet this requirement. Grey water tanks handling sink and shower waste carry no such obligation; standard rigid plastic is entirely appropriate there, and specifying food-grade for grey water is unnecessary cost.
Select mounting position based on three factors: available space, target capacity, and winter use. Internal mounting suits capacities up to roughly 60 litres, stays warm from cabin heat, and is straightforward to inspect. Underslung mounting preserves interior space and is the practical route to large water tank capacities of 70 litres or more, but requires a rigid chassis-mounted cradle, grade 316 stainless fasteners, and insulation or heat tape for sub-zero conditions.
Design maintenance access into the mounting arrangement from the outset. A tank concealed behind fixed cabinetry with no removable panel will not be inspected, cleaned, or serviced. Neglected fittings fail; neglected tanks become hygiene risks. Removable panels with quality latches and hinges cost little to plan in advance and a great deal more to retrofit.
If the build is at an early stage, one season on portable containers produces usage data that no guide can replicate. The numbers you record, actual litres per day across different trip types, define your minimum fixed tank size with precision. Commit to fixed installation once the layout is finalised and the usage pattern is known.
Conclusion
Tank selection is not a detail to resolve late in a build. The decisions made around capacity, material, and mounting position shape every system that connects to them, from plumbing routes to pump choice to winter usability.
Three points carry the most weight. First, calculate capacity from real usage data, not estimates. Second, specify food-grade polyethylene for any tank storing drinking water; the certification is non-negotiable. Third, design maintenance access in before the walls go up, not after.
The phased approach remains the most reliable path for anyone still planning. Run portable containers for a season, record what you actually use, then commit to a fixed installation built around verified numbers.
Start with your daily litre count, work outward to tank size and mounting position, and the rest of the system follows logically. A well-specified water system is one you will never think about again on the road.